Thu 29 Aug 2013
Multi Fabric Paneled Headboard
Posted by JoAnn under Bedroom
No Comments
Creating a customized headboard is easier than it sounds. Once you have all the materials ready to
go it’s pretty much a “staple and glue” process.
This particular multi fabric paneled headboard was inspired from one on Pinterest.
It was made to fit over a queen sized bed. The finished size is 64″ L x 48″ H.
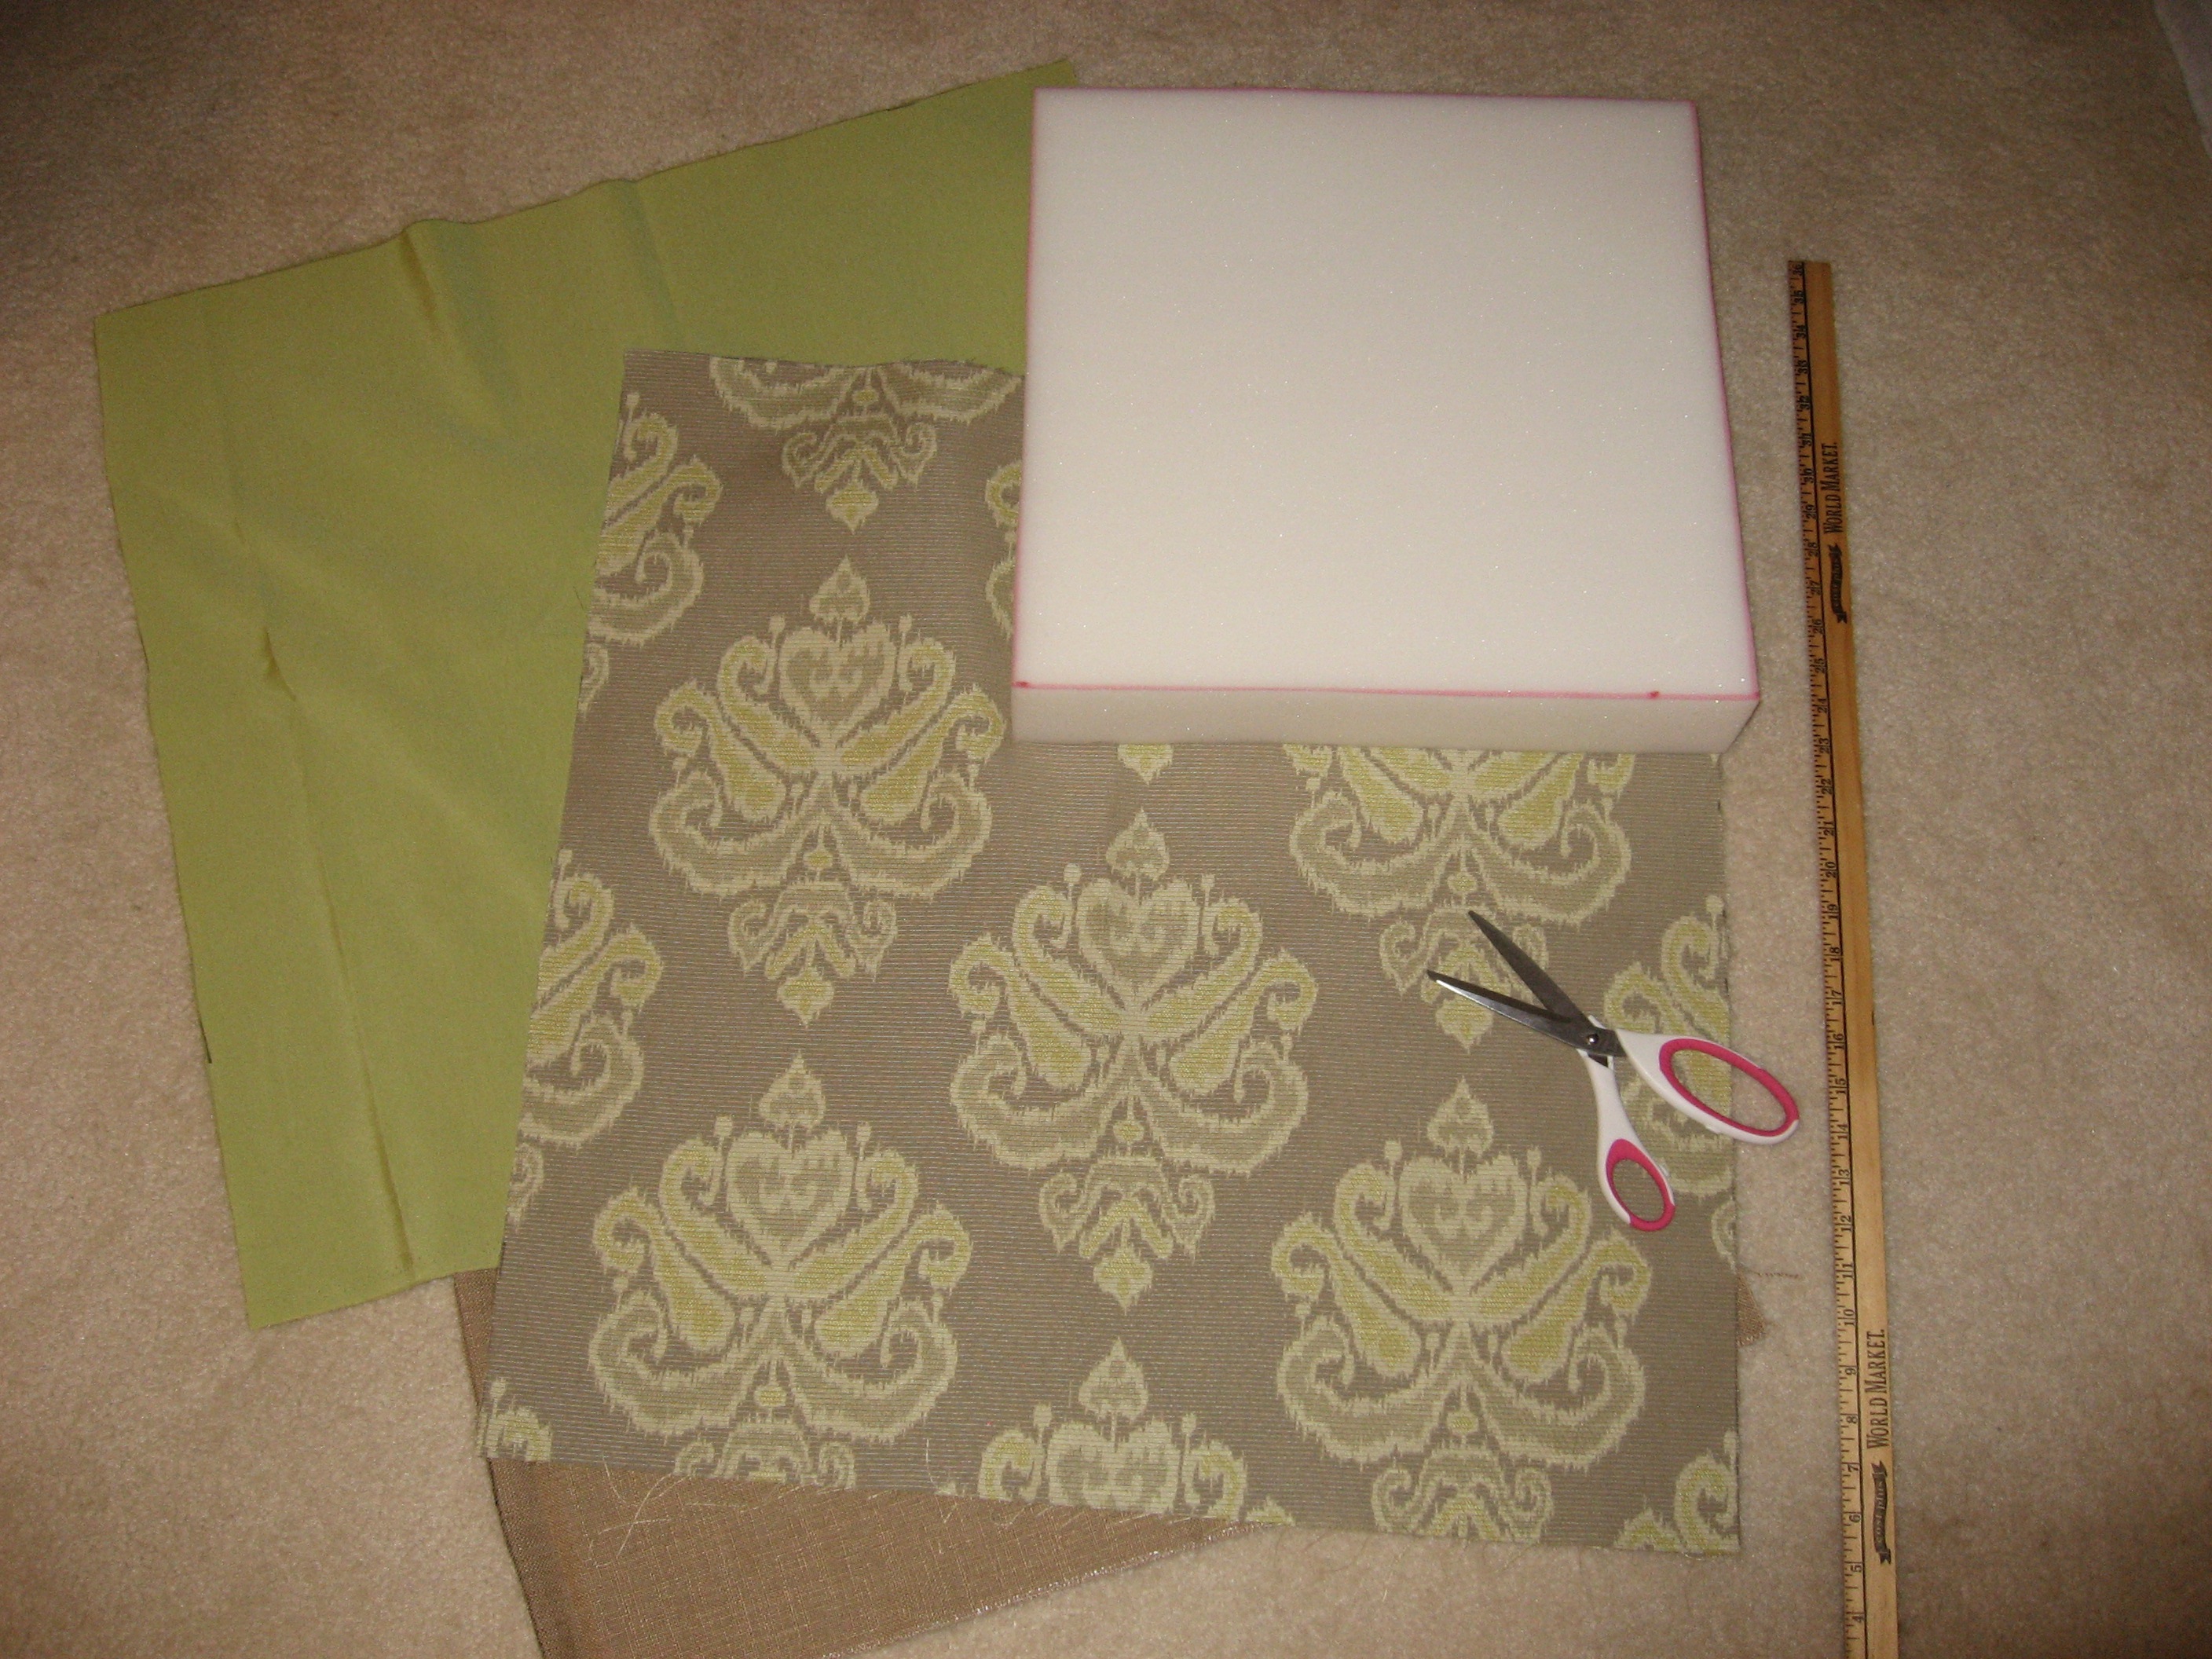
Materials:
– 12 – 16″x16″ good quality plywood that isn’t too thick. I bought 2 sheets of plywood at Home Depot and had the pieces cut there. (You
may have to pay a little extra for all the cuts.)
– 12 – 16″x16″ 3″ Foam
– Fabrics – 1 yard of each (we used 8 different fabrics)
– Batting (buy at craft or fabric stores)
– Staple Gun
– Scissors
– Yard stick
– Black marker
– Liquid nails (buy at the hardware store)
– 1 – 60″ x 44″ ply wood (mounting board)
– 1 French Cleat Picture Hanger

Fabrics selected for headboard.
Cut fabrics into 26″ x 26″ pieces and batting into 24″ x 24″ pieces. In the following order, layer 1 each of fabric, batting, foam and board.
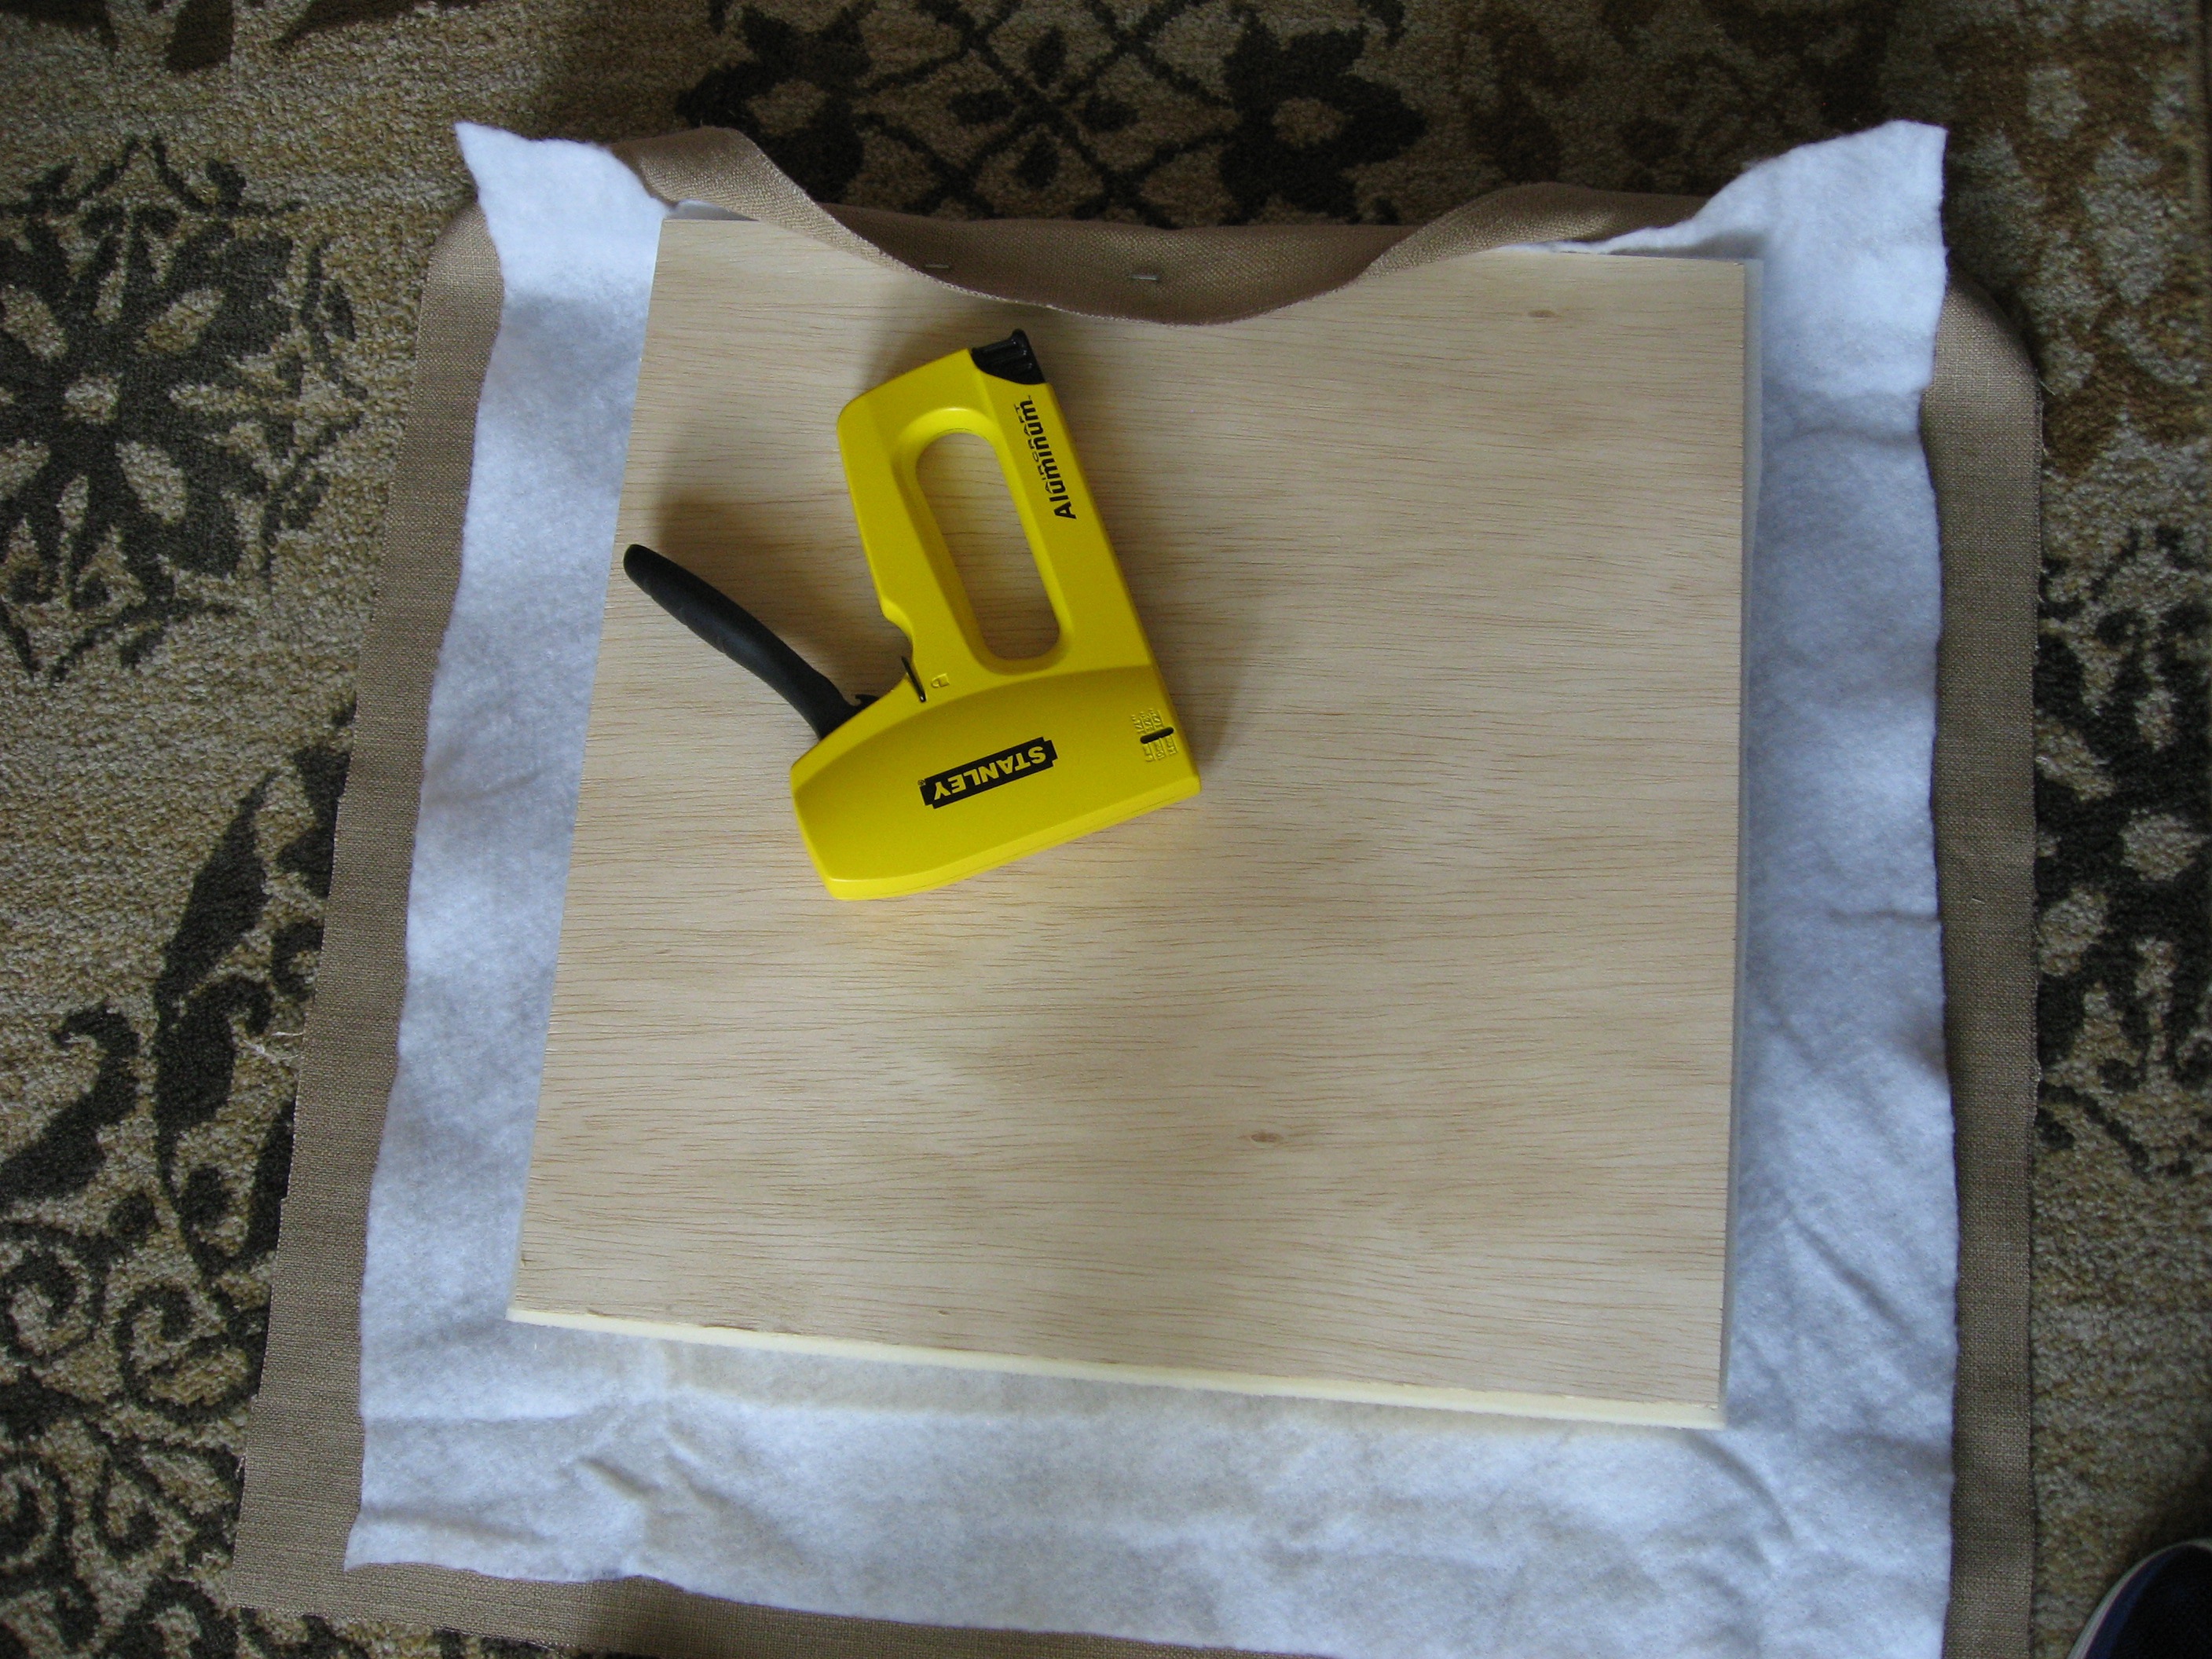
Then, pull up the sides in a tight and smooth fashion and staple. Fold over corners making a folded tuck for a neat edge; staple. Repeat until all squares are complete. Arrange the squares 3 rows in height by 4 squares horizontally per row the way you want them to look when hung on the wall.
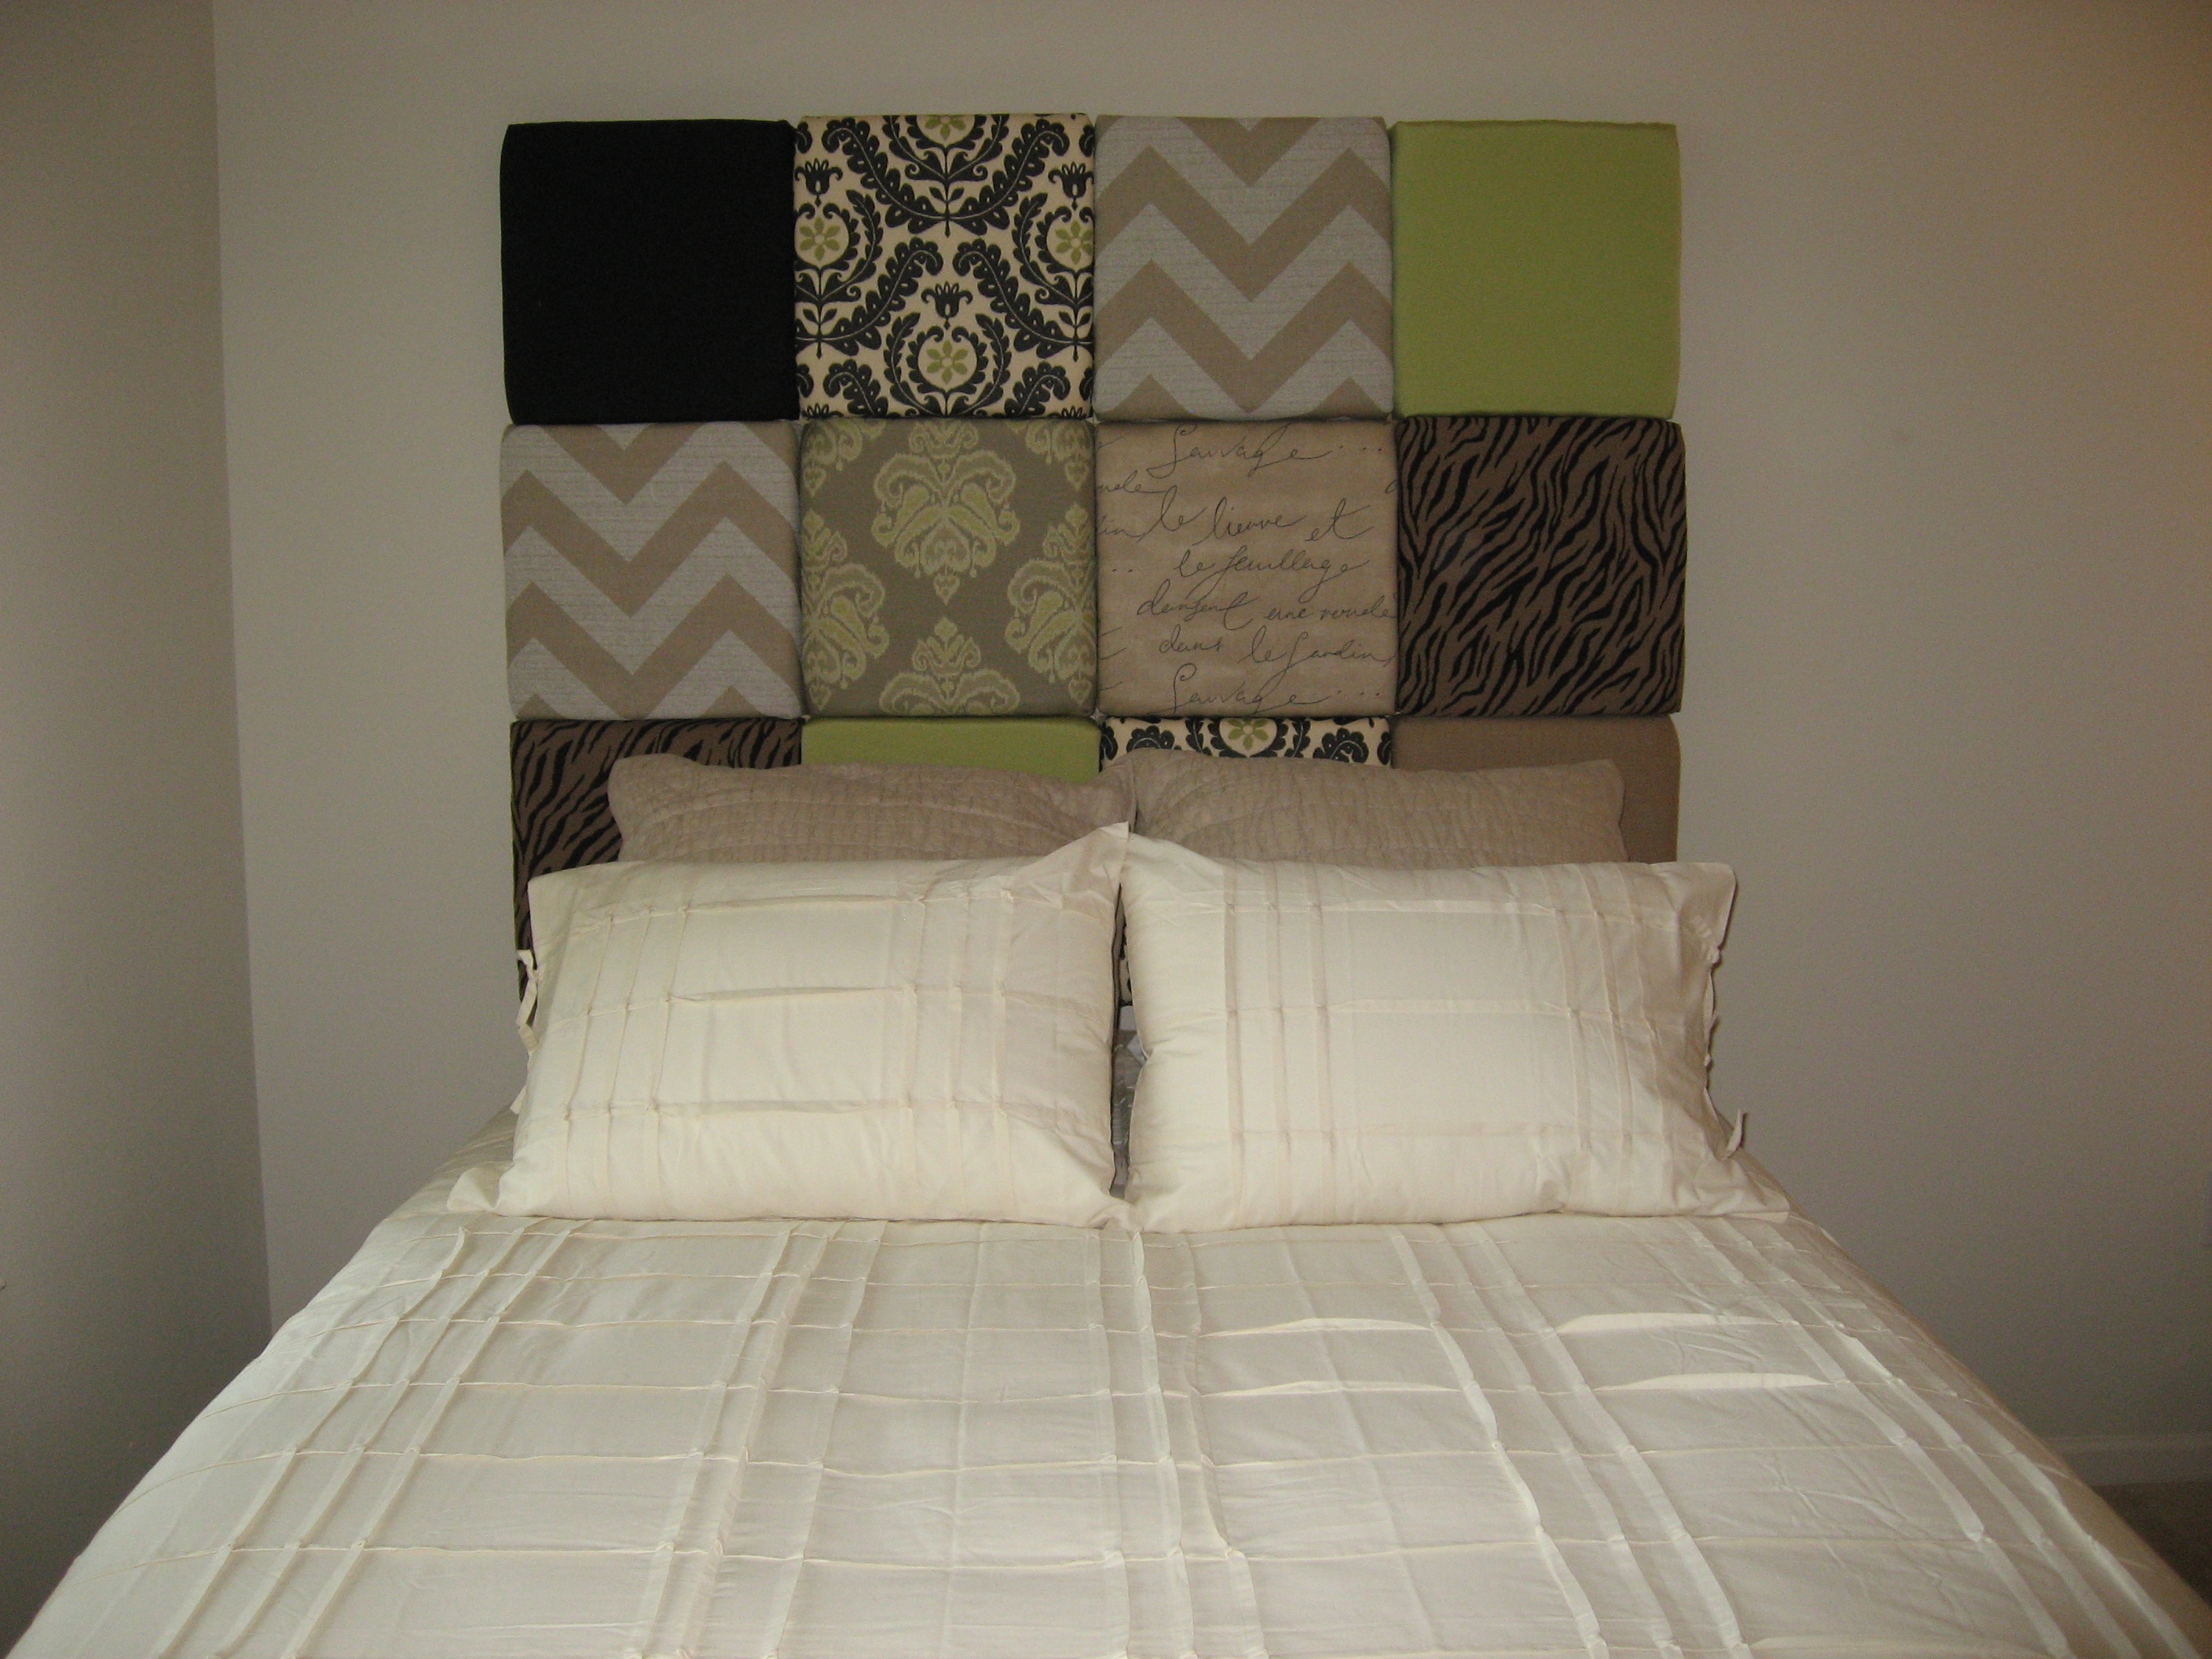
On 60″ x 44″ mounting board find the center point of board and draw a horizontal and a vertical line to use as placement guides. You will begin to attach the squares at the center line. The squares along the outer edges will hang over the mounting board by a couple inches. This keeps the mounting board hidden from side views. Once the glue is set, mount the French cleat on the back of the mounting board and wall.
Hang the awesome headboard you created on the wall and enjoy the view!
